For those of you who have meticulously updated your drivers manually or with the Intel Driver Update & Support Assistant, only to have Windows 11 sneak in and install an older version later, causing headaches and performance issues.
This has happened to me twice in the past two months. Intel ARC had the latest driver version (31.0.101.5382). However, the next day, I received a Windows 11 notification prompting me to reboot after another ARC driver update. When I checked Intel Arc Control, it surprisingly showed an older version (30.0.100.xxxx) still installed.
This simple guide will show you exactly how to stop Windows 11 from meddling with your drivers.
Here is the solution that worked for me.
Now remove the old drivers.
Open the Device Manager by right-clicking the start menu.
Find Intel graphics, right-click on it and choose ‘Properties‘, then roll back.
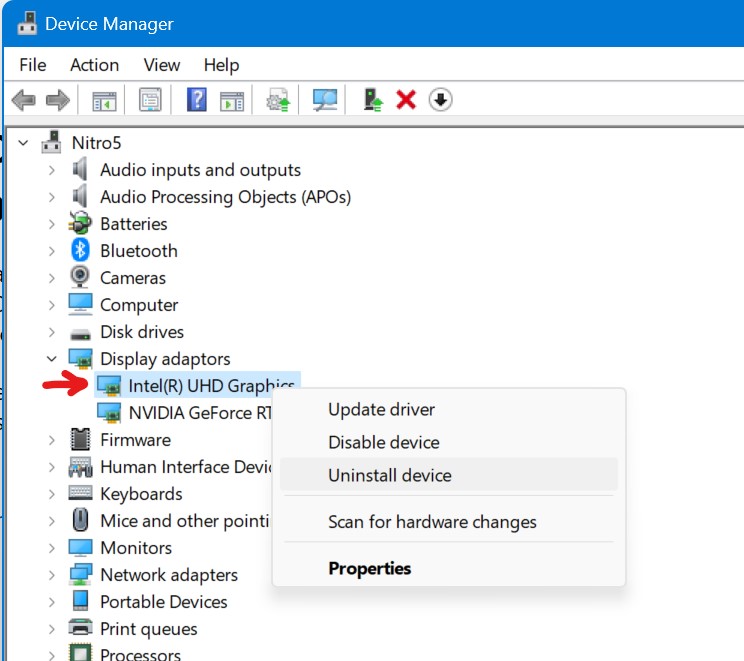
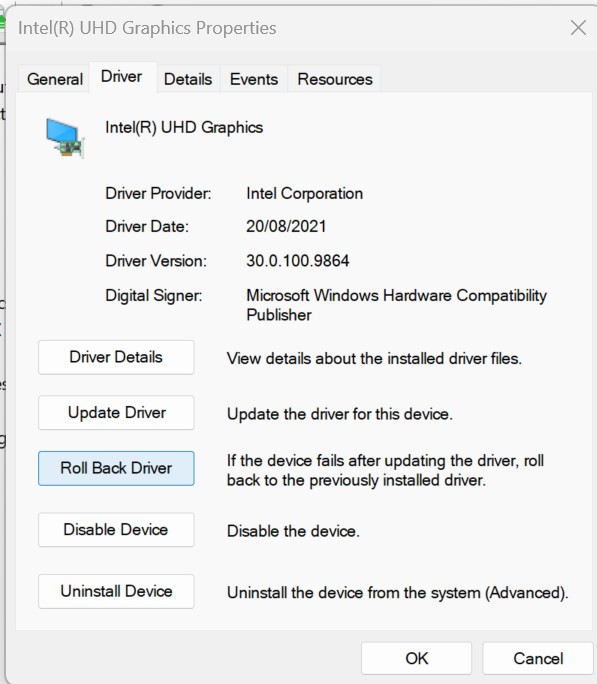
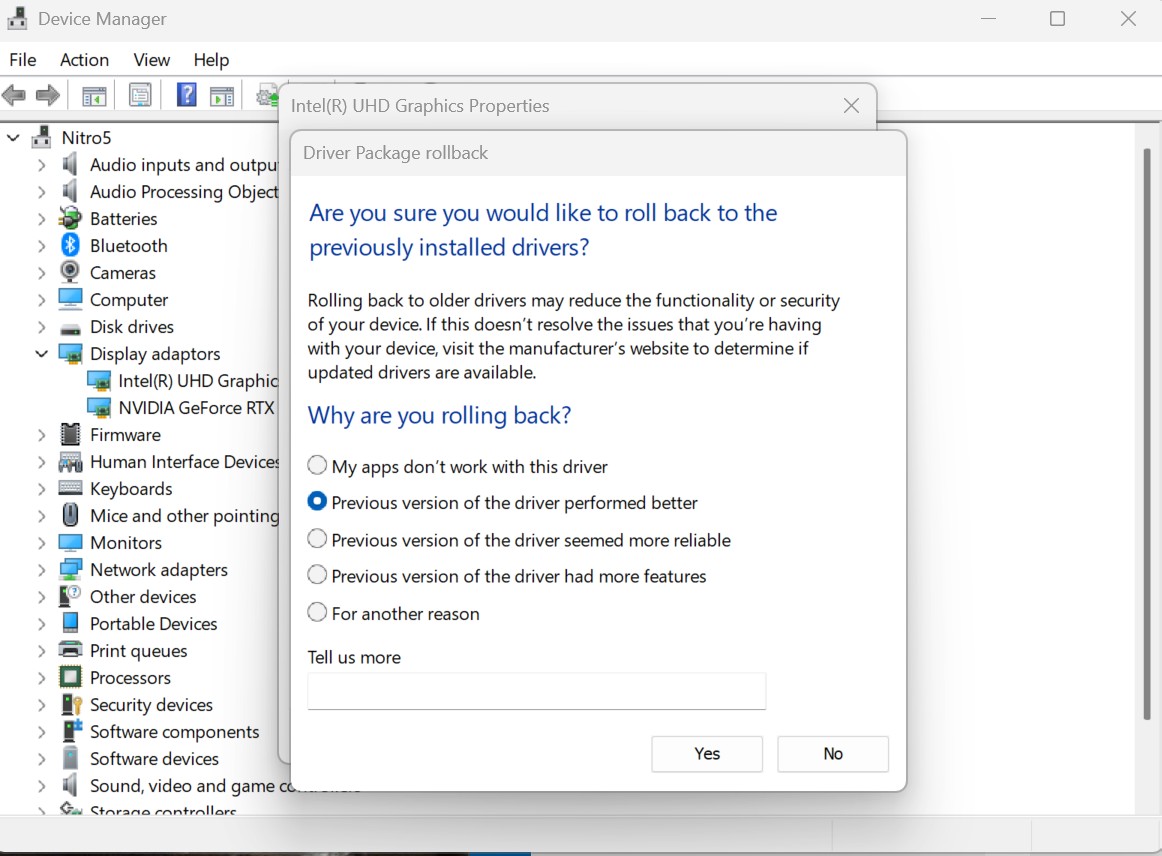
Once complete, restart the computer and it will automatically detect and re-add Intel Graphics with the previous latest version.
It can help to adjust following automatic driver updates.
- Press Windows key + R and Type sysdm.cpl and hit Enter
- Click the Hardware tab
- Click the “Device Installation Settings” button.
Click “No (your device might not work as expected)” option
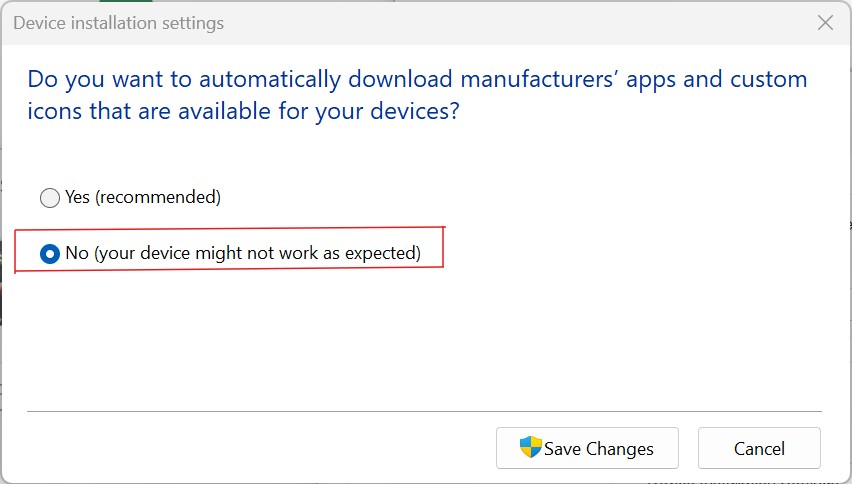
Click save changes.
Click OK
Strangely enough, this did not seem to change it in the registry. If you have Windows 11 Home, you won’t have the Local Group Policy Editor.
Disable automatic driver install from Registry
Click the Start menu and type ‘Regedit‘
Press CTRL+F and search for ‘DriverSearching’
Double-click the SearchOrderConfig entry and change its value from 1 to 0.
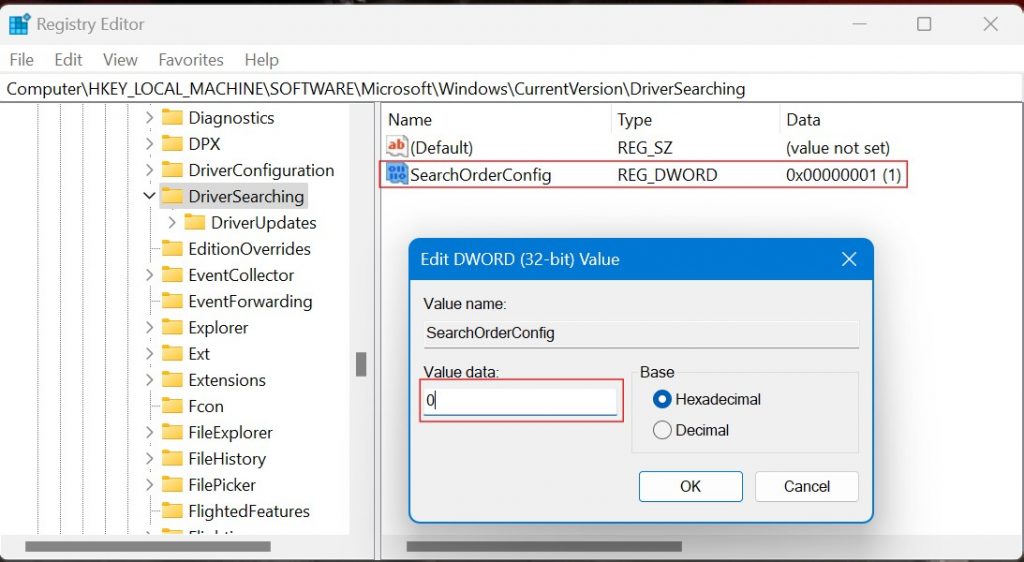
Click OK




You must be logged in to post a comment.